Make groundtruth for segmentation using path tool in Gimp
1. Open target image as a new layer

2. Click paths tool icon or tool => paths
3. Start drawing paths on the target image and when paths come to the started point: press Control and click at the started point.

4. Delete the current layer.
5. Add new layer.
6. Go to paths window and click at paint along the path.
7. Delete path.
8. Export as figure 🙂

how to install opencv and qt in Ubuntu 12.04 step by step tutorial
First of all, I would like to say “thank you” for all these links (list in the last) which guild me to successfully install OpenCV2.4.6.1 and Qt5.1 in Ubuntu12.04
Note: Mine is clean installation.
OpenCV2.4.6.1 Installing processes:
1. Install all packages which needed by opencv
$ sudo apt-get update
$ sudo apt-get -y install build-essential cmake libv4l-dev pkg-config libgtk2.0-dev libtiff4-dev
                          libjasper-dev libavformat-dev libswscale-dev libavcodec-dev libjpeg-dev
                          libpng-dev
2. Download OpenCV for Linux (we will download all file to be in directory Download)
$ cd Downloads
$ wget http://downloads.sourceforge.net/project/opencvlibrary/opencv-unix/2.4.6.1/opencv-2.4.6.1.tar.gz

3.Extract the archive and change directory to the newly created directory
which contains the OpenCV source
$ tar -xvf opencv-2.4.6.1.tar.gz
$ cd opencv-2.4.6.1/
4. Make new directory to contain all build files generated by CMake
$ mkdir release
$ cd release
5. Generate the makefile using CMake (more option could be added)
$ cmake -D CMAKE_BUILD_TYPE=RELEASE -D CMAKE_INSTALL_PREFIX=/usr/local ..
6. Compile and then install OpenCV
(It will take several times for make command)
$ make
$ sudo make install
7. Add the path to the Environment variable so that
the system would generated OpenCV libraries
$ export LD_LIBRARY_PATH=~/Downloads/opencv-2.4.6.1/release/lib:$LD_LIBRARY_PATH
$ sudo ldconfig
8. Close the terminal or logout your system to make your system fully up-to-date.
9. Test your OpenCV using example in sample/c directory
$ cd /home/"your user name"/Downloads/opencv-2.4.6.1/samples/c
10. Run all example code written in C
$ ./build_all.sh
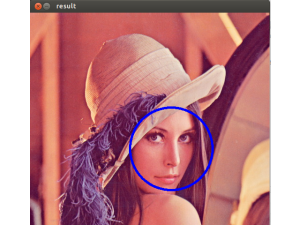
11. Test for face detection algorithm
$ ./facedetect lena.jpg
12. You would get something showing like picture below

Qt5.1 Installing processes:
1. Download Qt
$ cd ~/Downloads
$ wget download.qt-project.org/official_releases/qt/5.1/5.1.1/qt-linux-opensource-5.1.1-x86-offline.run
2. Change permission to execute the downloaded file
$ sudo -s chmod u+x qt-linux-opensource-5.1.1-x86-offline.run
3. Install Qt (GUI installation process)
$ sudo -s ./qt-linux-opensource-5.1.1-x86-offline.run -style cleanlooks
4. Change persimssion on the Qt directory location to be available by all users
$ sudo -s chmod -R 777 /opt/Qt5.1.1/
$ sudo -s chmod -R 777 /home/chada/.config/QtProject
5. New Project
New Project => Qt GUI Application
6. Build by Ctrl+B; in case, you are running error like Cannot find -lGL
$ sudo apt-get -y install libgl1-mesa-dev
7. Try to debug ; in case, you are running error
ptrace: Operation not permitted.
Could not attach to the process. Make sure no other debugger traces this process.
Check the settings of
/proc/sys/kernel/yama/ptrace_scope
For more details, see /etc/sysctl.d/10-ptrace.conf
try for temporary solution (recommended)
$ echo 0 | sudo tee /proc/sys/kernel/yama/ptrace_scope
8. In .pro file, Add library path of OpenCV
# To check included Path
$ pkg-config opencv –cflags
#To check library
$ pkg-config opencv –libs
For example:
SOURCES += main.cpp
INCLUDEPATH += /usr/local/include/opencv
LIBS += `pkg-config opencv –cflags –libs`
or
INCLUDEPATH += /usr/local/include/opencv
LIBS += -L/usr/local/lib
LIBS += -lopencv_core
LIBS += -lopencv_imgproc
LIBS += -lopencv_highgui
LIBS += -lopencv_ml
LIBS += -lopencv_video
LIBS += -lopencv_features2d
LIBS += -lopencv_calib3d
LIBS += -lopencv_objdetect
LIBS += -lopencv_contrib
LIBS += -lopencv_legacy
LIBS += -lopencv_flann
LIBS += -lopencv_nonfree
# -L represents for Directory
# -l represents for file
9. In main.cpp file, Add codes as show below
#include <cv.h>
#include <highgui.h>
int main(){
//read an image
cv::Mat image = cv::imread(“/home/”your user name”/QT_projects/testopencv0/example.jpg”);
//check an image
if(image.empty()){
std::cout << “!!!Failed imread(): image not found” << std::endl;
return 1;
}
//create image window name “My image”
cv::namedWindow(“My image”, CV_WINDOW_AUTOSIZE);
//show the image on window
cv::imshow(“My image”,image);
//wait key for 5000ms
cv::waitKey(5000);
return 1;
}
9. Run your program ( Ctrl+R), output would show something like this

Refferences:
http://opencvstart.blogspot.com/2012/12/configure-opencv-24-for-qt-creator-on.html
https://code.google.com/p/qt-opencv-multithreaded/wiki/Documentation
http://www.wikihow.com/Install-Qt-SDK-on-Ubuntu-Linux
http://stackoverflow.com/questions/14911365/how-to-install-opencv-in-ubuntu-12-04
http://askubuntu.com/questions/244336/receiving-error-while-trying-to-debug-in-qtproject
http://stackoverflow.com/questions/18406369/qt-creator-cant-find-lgl-error
How to fix “err: unknown filesystem grub rescue>
I have resized the ntfs partition in my system which is dual boot of Ubuntu and Window
I fond grub rescue> after restarting
I solve with this series of commands (my Ubuntu was installed in (hd0,0)
grub rescue> set root=(hd0,0)
grub rescue>set prefix=(hd0,0)/boot/grub
grub rescue>insmod normal
grub rescue>normal
After entering those command, I could open my Ubuntu, the rest are update and reinstall grub again
$sudo update-grub
$sudo grub-install /dev/sda
thanks http://askubuntu.com/questions/142300/how-to-fix-error-unknown-filesystem-grub-rescue
solve yum command in CentOS with error 22 “The requested URL returned error: 404”
using command yum clean all to solve
SIMPLE EXAMPLE OF APPLYING EXTENDED KALMAN implementation with Matlab
function [X,mu,Sigma,err] = bug_demo()
%Simulate the EKF on a problem of a bug movement estimation with
%Estimate x and y position based on prior state
%set up and display simulation parameters
X = gen_sim_data();
Z = get_obs(X);
%Initial given distribution
[mu{1}, Sigma{1}, Sigma_x] = initial_distribution(Z);
err = mu{1}-X{1};
err = norm(err(1:2));
for T = 2:size(Z,2)
muprev = mu{T-1};
[pred_x,Jf] = sysf(muprev);
[pred_z,H,Sigma_z] = sysh(pred_x);
pred_sig = Jf*Sigma{T-1}*Jf’ + Sigma_x;
residual = Z{T}-pred_z;
e(T) = norm(residual);
K = pred_sig * H’ * inv( H * pred_sig * H’
+ Sigma_z );
Sigma{T} = (eye(size(K,1)) – K * H) *
pred_sig;
munew = pred_x + K * residual;
mu{T} = munew;
xnew = X{T};
err(T) = norm(munew(1:3) – xnew(1:3));
end;
figure(1);
plot_sim_data(X, Z, mu);
end
function X = gen_sim_data()
X{1} = [0.1 45 1.6667]’% [dl theta_l v]
%The object takes about 1minute to travel along a stright line in XY plane
%getting 100 cm of distance.
t = 1;
for i=1:50
t = t+1;
prevX = X{t-1}; %Last state
dl = prevX(1); %Last left lateral distance
theta_l = prevX(2); %Last angle of the bug to left side of sink
v = prevX(3); %Last velocity
delta_t = 1/30;
d = v*delta_t;
%Distance, delta_t at 30s
%Velocity 100cm/min
ll = d*cos(theta_l*pi/180);
New_dl = dl+ll;
newX = [New_dl theta_l v]’;
X{t} = newX;
end
end
function Z = get_obs(X)
for i = 1:size(X,2)
thisx = X{i};
obs_dl = thisx(1)+(randn(1)/5);
Z{i} = [obs_dl]’;
end
end
function [mu, Sigma, Sigma_x] = initial_distribution(Z)
thisz = Z{1};
mu = [thisz(1) 0 0]’;
Sigma = diag([0.1 10/180*pi 0.5].^2);
deltat = 1/30;
Sigma_x = diag((deltat*[0.1 10/180*pi 0.5].^2));
end
function [xnew,J] = sysf(xold)
dl = xold(1);
theta_l = xold(2);
v = xold(3);
delta_t = 1/30;
xnew = [dl+(delta_t*v*cos(theta_l))
theta_l
v];
%Jacobian
grad_dlnew = [1, (delta_t*v*- sin(theta_l)),
(delta_t*cos(theta_l))];
J = [grad_dlnew
0 1 0
0 0 1];
end
% measurement model
function [Z,H,Sigma_z] = sysh(X)
H = [1 0 0];
Z = H*X;
Sigma_z = [0.05];
end
% visualization
function plot_sim_data(X, Z, Xest)
%plot of dl
subplot(1,1,1);
for i = 1:size(X,2)
thisx = X{i};
plotx(i) = thisx(1);
end;
hold off;
plot(plotx,’-.*r’);
hold on;
for i = 1:size(X,2)
thisx = Z{i};
plotx(i) = thisx(1);
end
plot(plotx,’-.og’);
if ~isempty(Xest)
for i = 1:size(X,2)
thisx = Xest{i};
plotx(i) = thisx(1);
end
plot(plotx,’-.+b’);
end
hold off;
title ‘estimation of d_l’;
end
pdf viewer doesn’t work in Kile Ubuntu
After installing Kile, I got the problem that after I compile the text file I couldn’t open pdf by using ViewPDF (Alt+7).
The log window is shown the message “[ViewPDF] exit code 127. <file name>.pdf (okular). The problem is I don’tinstall okular yet so the solution for this problem is
sudo apt-get install okular
How to install Adobe Flash Player 10 In Ubuntu 10.04
If somebody couldn’t open video in Youtube and the error is shown is “Lack of suitable plugin” then you should do something like this
1. sudo apt-get install remove flashplugin-* –purge
To remove all plugins of flash player
2. sudo apt-get install flashplugin-nonfree
To install new version of flash player
Installing Apache, PHP, MySQL and phpMyAdmin on Ubuntu 9.04
Installing Apache
1. Type as following command:
sudo apt-get install apache2
Installing php5
1. Inside Terminal, execute the following command:
sudo apt-get install php5 libapache2-mod-php5
2. When setup is complete, you have to restart Apache so that php5 will work on Apache. Execute the following command in Terminal:
sudo /etc/init.d/apache2 restart
Installing MySQL
1. Inside Terminal, execute the following command:
sudo apt-get install mysql-server libapache2-mod-auth-mysql php5-mysql
2. Towards the end of the installation you will be prompted to set your root or admin password (see pic below)

Installing phpMyAdmin
1. Inside Terminal, execute the following command:
sudo apt-get install phpmyadmin
2 During the installation you will be asked to select the webserver that would be used to run phpMyAdmin. Select Apache2 (see pic below).

3. After the installation is over execute the following command to copy the phpmyadmin folder into the /var/www/ directory. (By default it is installed in /usr/share/phpmyadmin/ directory.)
sudo ln -s /usr/share/phpmyadmin/ /var/www/phpmyadmin
4. Now you can go to the phpMyAdmin login page by pointing your browser to: http://localhost/phpmyadmin/index.php
The username for MySQL and phpMyAdmin is “root”. The password will be what you set in step 2 (under installing MySQL).
That’s it! Now you’ve successfully installed Apache 2 webserver, php5, MySQL and phpMyAdmin on Ubuntu.
Command line for PostgreSQL in Ubuntu
1.Start data base
sudo /etc/init.d/postgresql-8.4 start
2. Login to your database in this case my data base name is Research0_development and username is chada
psql -d Research0_development -U chada
3. command for examine the database
- \l :List databases
- \c database-name :List databases
- \d :List tables in database
- \d table-name :Describe table
- \q : quit
- select * from table-name :List table contents
- delete from table where condition =>
delete from place_ratings where user_id = 49;
Installation Wekaclassalgos1.7 in Ubuntu
Wekaclaaalgos1.7 is the tool that using for data mining.
1. Download Wekaclassalgos1.7.zip which use for both ubuntu and window at this website http://linux.softpedia.com/get/Science-and-Engineering/Mathematics/WEKA-Classification-Algorithms-30935.shtml
2. Unzip in everywhere that you want then execute command following for start Weka.
~/weka$ java -jar wekaclassalgos.jar
